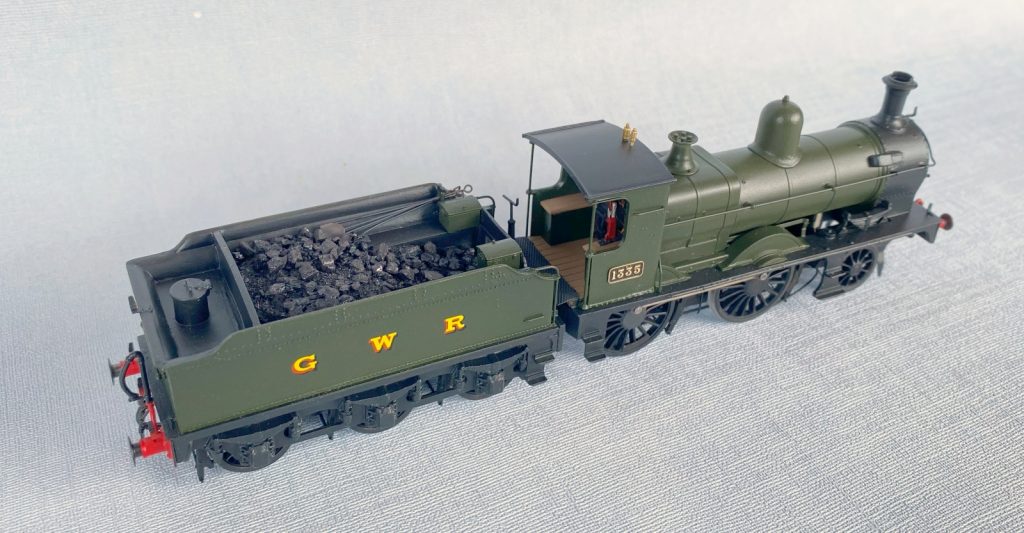
This loco was the result of a commission to produce a model of GWR 1335, an ex-M&SWJR 2-4-0, in post WW2 condition, using the Nu-Cast Partners body and the Rumney Models chassis that I designed to fit it. The build was mostly straightforward though there were a couple of areas that had me reaching for my CAD programs and there were an awful lot of whitemetal fillings…
Down Below
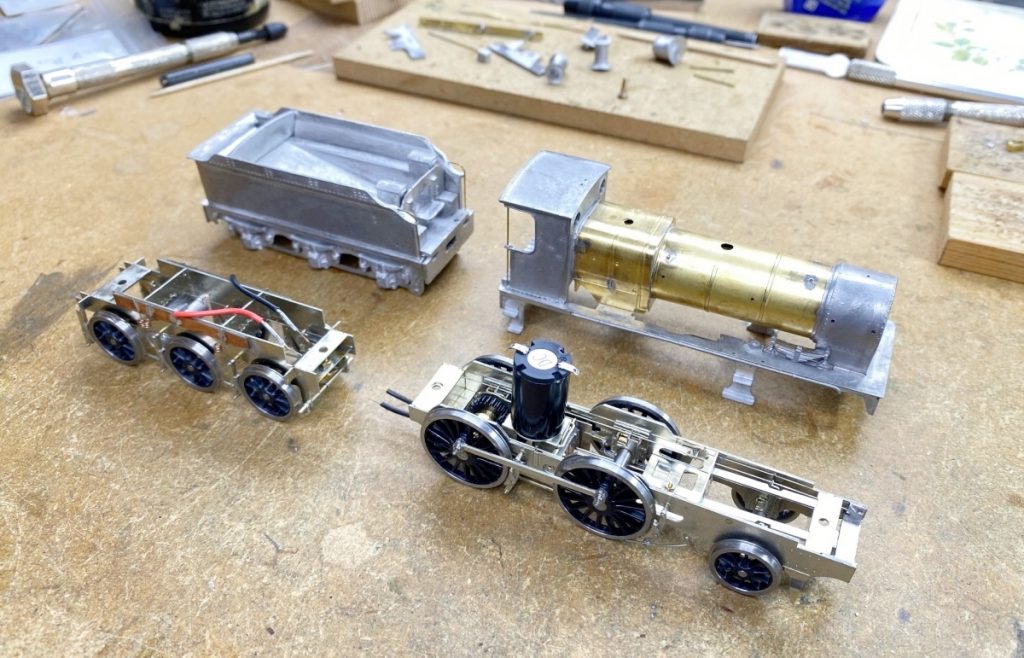
The loco and tender chassis were built pretty much as per the instructions, so I won’t go into that here. For those that are interested the instructions can be found elsewhere on this website.
Drive components are High Level along with the bearings. The gearbox is a standard RoadRunner mounted on the rear axle with a coreless motor providing power. These High Level motors are lovely little things, and everything is arranged so that it sits vertically in the firebox. With a smallish loco and no need to find room for a flywheel, there seems little point in trying to contrive a different arrangement, it just takes up more space.
With the loco being fully sprung using CSBs, some form of torque control was needed on the gearbox. Anything that allows the gearbox to move vertically and to roll (also very important) but not to pitch will do. I soldered a small tab to the nearest frame spacer and ‘slot’ for this tab to fit in was added to the gearbox using wire.
Wheel are Gibson. They are fixed in place using Loctite 603 with a groove cut into the axle about half way across each boss. There’s nothing wrong with using these retaining compounds to fix driving wheels, but you have to bear in mind that three conditions need to be satisfied for it to work. There needs to be the presence of steel and the absence of oxygen for it to expand (no problem there) but there also has to be Loctite present. By pushing a shaft into a tight fitting hole most of it is going to come out and it’s probably not much surprise that such joints can be weak. The groove in the axle ensures that the vital ingredient is still in the mix.
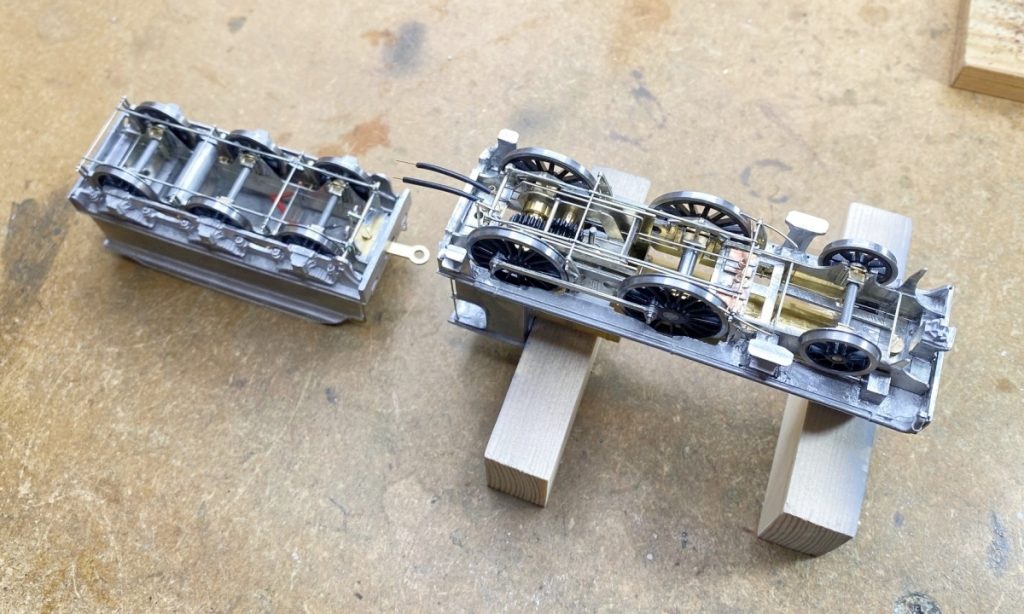
Pickups are made from 33SWG phosphor bronze wire with a few coils put in using the shank of a 1mm drill held in a pin vice. All of the tender wheels pick up as do the leading driving wheels. The loco pickups are mounted to pcb soldered to the removable keeper plate. Bits of wire link everything.
Up Above

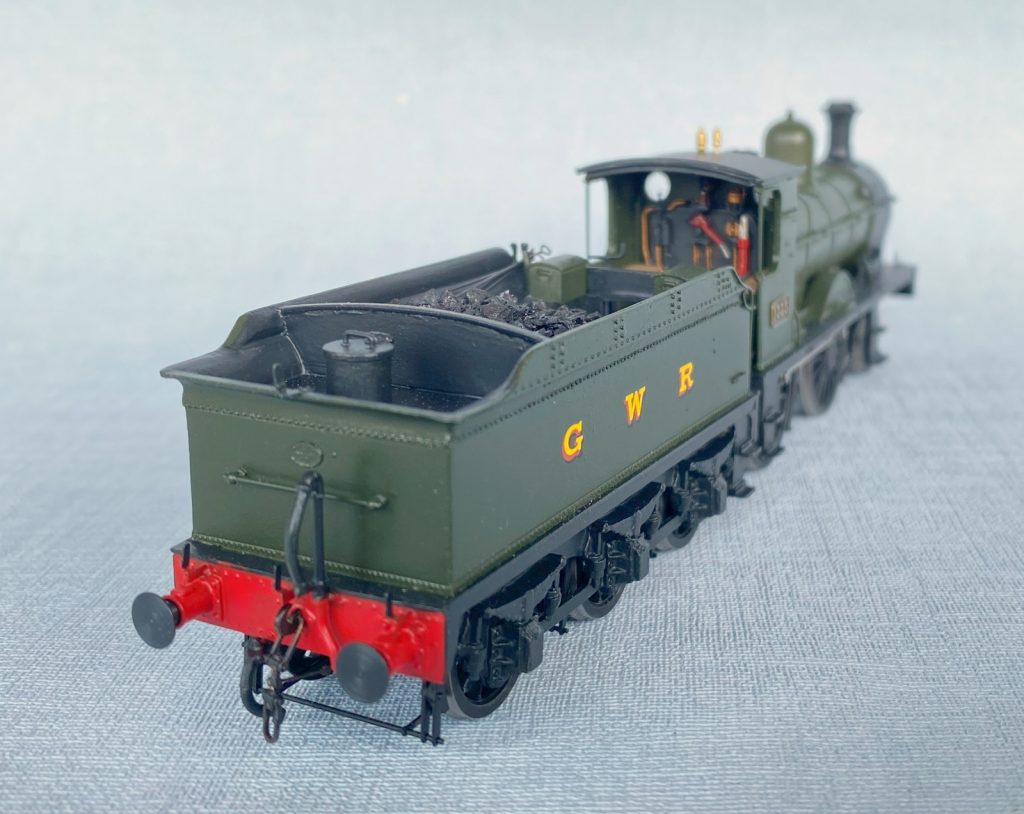
It had been a long time since I tackled a whitemetal kit and it was not a hugely pleasurable experience. In theory they should be quick and easy but that entirely depends on the fit of the parts and this one took a lot of fettling. Sitting about with a file constantly checking how two parts go together is not a job I particularly enjoy, whether it’s whitemetal or 3D prints. I prefer working with brass which is a much cleaner business. However, thanks to a hefty file and a good dollop of low melt solder, a decent finish was achieved. All the whitemetal adds of course to the weight of the thing which is no bad thing in the loco. The tender is another matter, and this one is a serious lump. For a small loco haling small trains this is perhaps not too much of an issue, but I do wonder how much of what you gain through weight on the driving wheels is being taken away by having to haul the extra weight around! There was one area though where I felt replacing the whitemetal bits was the better course of action.
The boiler casting was ok but had a bit missing from the bottom where a motor was supposed to go. This could be filled but the firebox was lopsided and had the wrong pattern of detail on it for 1335. The three locos in this class all seemed to have different fireboxes and although the detail could be changed there was not getting away from the fact that the firebox was higher on one side than the other. Out with AutoCAD and etches were drawn up for a replacement. While I was at it, I also included a new cab floor, fall plate and a jig to drill the holes for the handrail knobs in the smokebox. Cab side plates were also done.
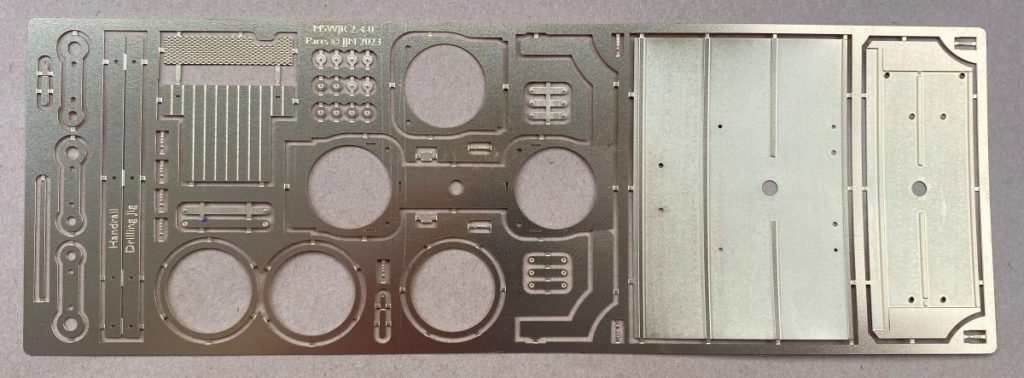
There were also the splashers to think about. Like the firebox, these were a different pattern in the kit to 1335. They are quite complicated being ‘stepped out’ around the coupling rods and also quite narrow. It seemed sensible to 3D print these which made light work of the complicated shape and avoids any potential issue with shorts.
Buffers on the loco at the time being modelled were GWR tapered and, not being happy with what was available, I did some 3D prints for the housings. The tender buffers had large diameter shank self contained buffers and for these I used some Lanarkshire Models castings. Metal buffer heads and springs were added after painting.
Finishing
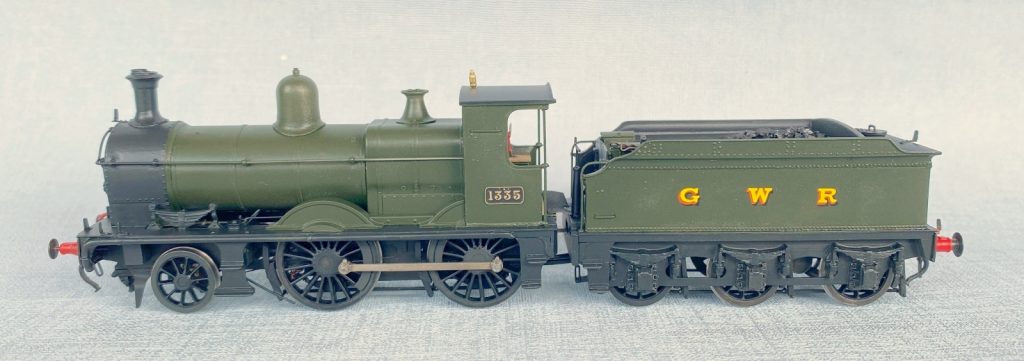
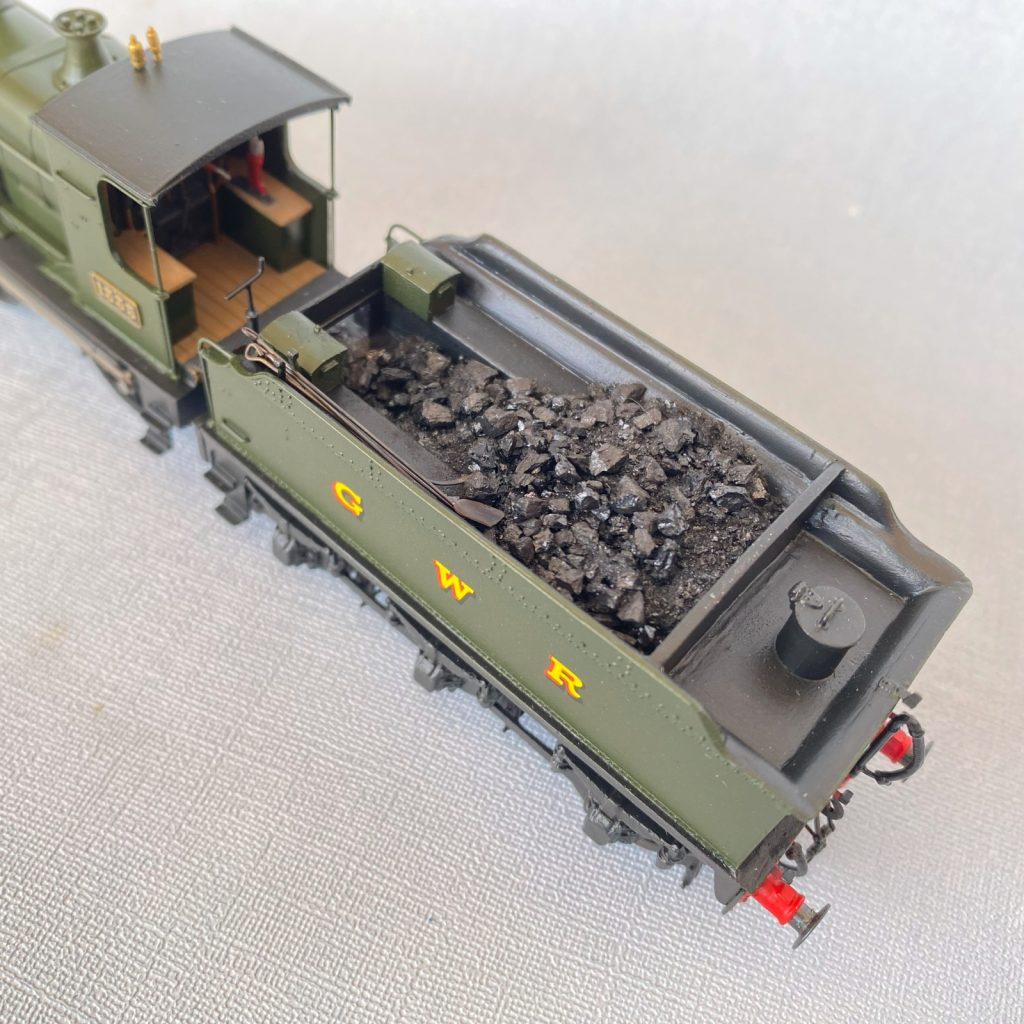
Everything was stripped down and primed, then the loco and tender chassis were sprayed black using Vallejo paints. The green on the bodies was added using land rover deep bronze green cellulose and, once dry, the red and black were hand painted using enamels as per Ian Rathbone. This was a slow process and in future I’d probably try and spend a bit more time masking off and spraying the back where possible. I would also paint the tender toolboxes separately as they are a pain to work around. The enamel black came out a bit of a washy look to it which had me worried for a while but was rectified later in the finishing process.
The cab floor was painted a wood colour and the cab seat and reverser stand, which I had painted separately, were glued in place.
Transfers are from Fox and I handmade new whistles from brass wire and tube as I couldn’t get anything in brass from the trade at the time.
The whole thing was given a final coat of Vallejo polyurethane satin varnish to protect everything and sort out the washy black, which it did very nicely. It’s amazing what a decent coat of varnish will do!
Real coal was added over a carved foam base and fire irons made up as per Gerry Beale’s notes in his Manor article in MRJ 303 and the accompanying works drawing. I was particularly pleased with the shovel for which I did a 3D printed forming jig.
We had fun running her around Robin Whittle’s Barrow Road before she went to her new home. She ran well but I pity her having to haul that tender around all the time!
Justin Newitt – March 2026